Pages

Saturday, 19 September 2015

Modern Country Style Boys' Bedroom Reveal And Resource List

The reveal of our Modern Country Style boys' bedroom....
is here!!


Here's what we started with...


Possibly the world's most epically colourful room...

Green, yellow, orange and white.
Not a touch of Modern Country Style in sight.
{A li'l bonus poem thrown in for free ;-) )


We started off by getting the bones of the room right.
Removing the dated glass above the door.


Replacing the door itself with a stripped pine beauty sourced from Oxford University made the most enormous difference. We've done this throughout the whole house and it was one of the best investments we made, and one I recommend to clients who live in period houses but have inherited ugly replacement doors. You'll be amazed by the difference.


We had the floorboards stripped, sanded, stained and varnished to withstand all that little boys can throw at it!! The built-in wardrobe doors were waxed, and the original fixing giving a good rub-down.


The bespoke shelves were put in by the previous owners and were way to good to rip out so we incorporated them into the room by painting the framework Dulux White gloss  (my go-to white). We left the inners as bare wood because I want to minimise chipping in the future.


The walls were painted in Farrow and Ball's Pale Powder (case study here) the softest pale duck egg you can imagine (click through for the full Colour Case Study) with the ceiling in Dulux White.


The large check duvet is from The White Company.


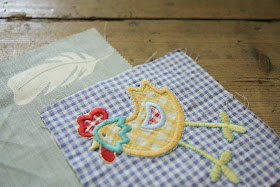
You can find full tutorial to make your own Patchwork Memory Quilt here...


(image via Cox & Cox)

The red gingham curtains and lampshade are from The White Company. {These have been discontinued.}


Our boys loved being here.


Loved? Past tense?
{Gasp}
Can that be right?!


Monday, 14 September 2015

How To Make An EASY Patchwork Memory Quilt

This is one of the easiest and most rewarding Modern Country Crafts you'll ever do: your very own patchwork memory quilt.


I say easy because the only sewing involved is straight lines.
It's rewarding because it involves the repurposing of all those little treasures that have been stashed away. Little scraps of well-loved baby bedding, those beautiful but impossibly teeny baby clothes plus any left over bits and pieces you'd like to use up to create a work of art that you'll marvel at for decades to come.

This is all you need to do:

Cut out lots and lots and lots of rectangles of non-stretchy fabric. The bigger they are, the less sewing you'll have to do and the faster it'll all come together. I like the higgledy-piggledy effect of lots of different widths of rectangle but what matters is that the height should be consistent. Mine are 12cms high.


Iron all your pieces. 
{Don't miss this step as it'll make a huge different to the quality of the finished piece.}


Lay two of the rectangles right sides together and pin up the left side 1cm in from the edge. Sew up this line.


Take the next rectangle and pin it to the right hand edge of your mini quilt 1cm in from the edge. Sew in place.


Keep going until you have a long strip of rectangles of the desired width. Make lots of rows in this way. Then pin two rows together 1cm in from the edge, Sew along this line. Keep sewing rows together until the quilt is the desired length.

Cut a large piece of fabric for the backing. This needs to be the size of the finished quilt plus 5cm in each direction. Lay the quilt and backing right sides together, pin 2.5 cm in from the edge and sew together, leaving one side unsewn. Turn it the right way and hand sew the last side. I also included a layer of thick wadding at this point which makes the whole quilt seem much more substantial.


Sew a variety of buttons onto the quilt, through all layers to hold it all in place and then dance for joy at what your clever hands have produced: a perfect and easy-peasy patchwork memory quilt, and ooh and aah over those sweet little memories ready for teary reminiscing at a moment's notice.