Friday, 10 December 2010

Wreath Friday Link Party!

You've all come wearing gorgeous party frocks and shoes (and tiaras for some, I hear!!)? Why could that be?

{As if I could ever forget!}

Yes, it's....

Wreath Friday at Modern Country Style.

And did you remember your wreaths?

You did? Why thank you!


Let's just have a quick recap, just click on the links to see the full post.

On Monday, you (hopefully!) learnt how to make your very own quick and easy Wreath Base out of prunings from your garden.


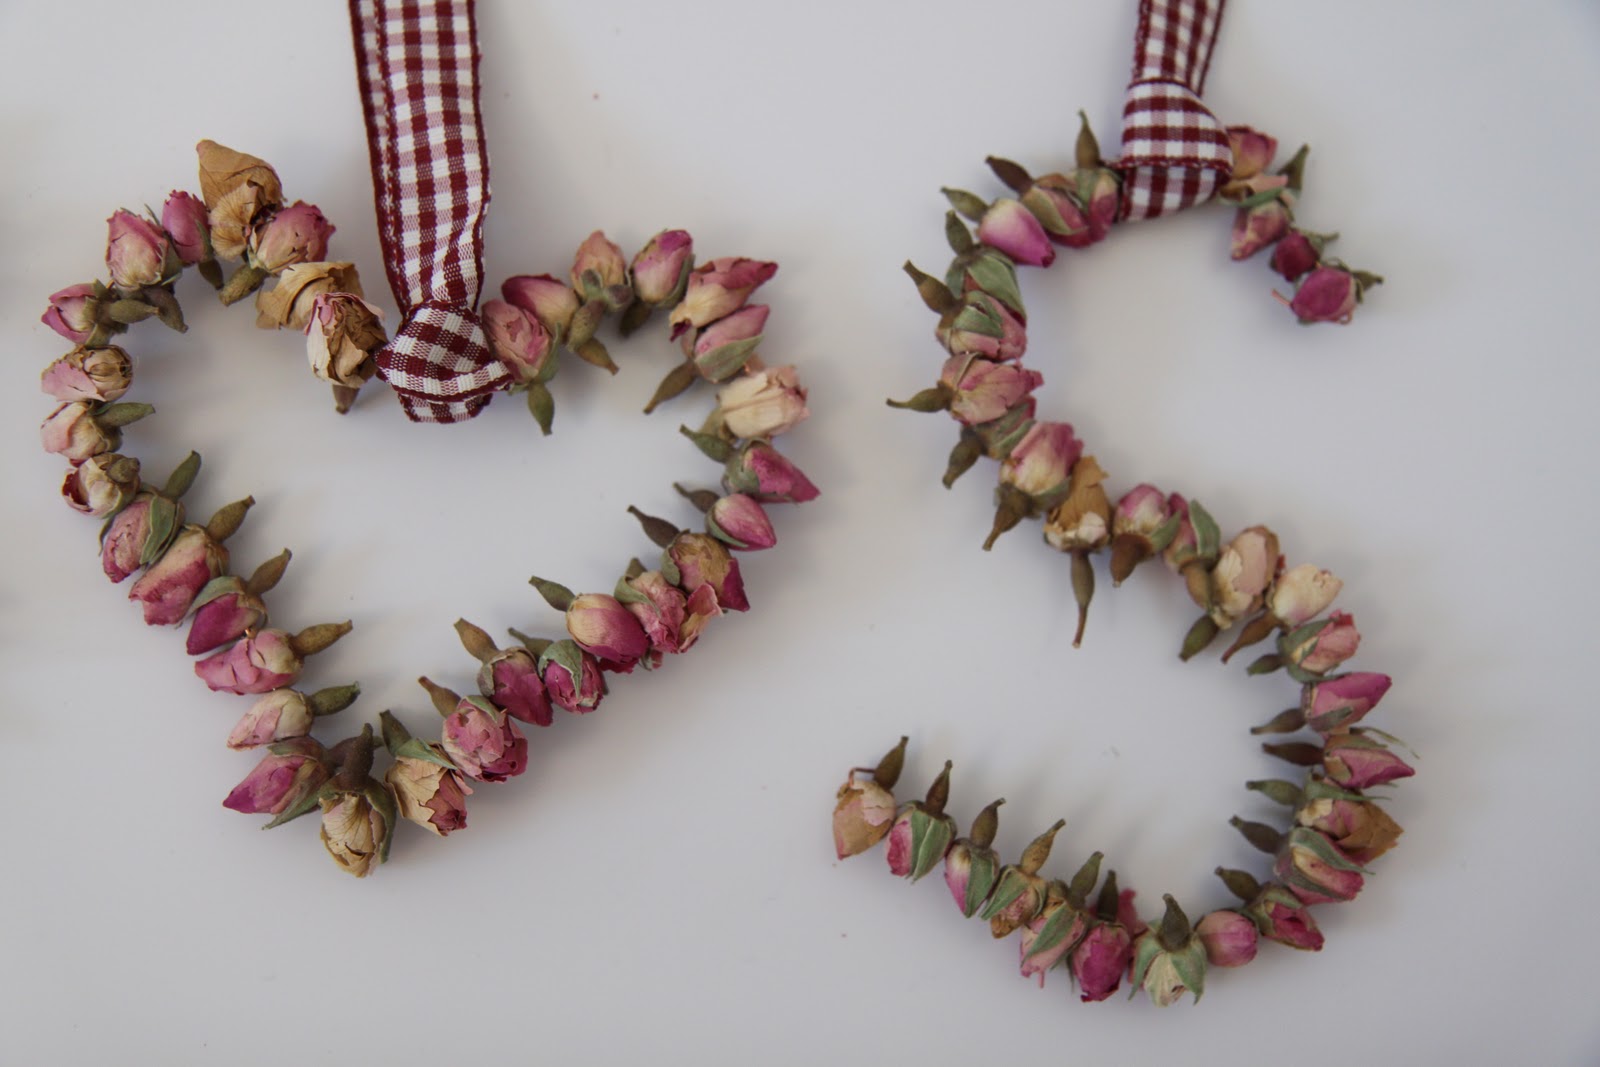
On Tuesday, dried flowers from the garden got their chance to shine in the Natural Beautiful Wreath tutorial.


Thursday was the turn of the Cinnamon and Orange Wreath Tutorial.


And Friday? Well, Friday is today and today is Wreath Friday!!

Are there any rules, I hear you cry? Errrrr, not really, I don't think. Do you have any rule ideas?

You're desperate for me to make it obligatory for people to Follow me and that they should be put in the stocks and have rotten tomatoes thrown at then if they don't?

Aaah, that's so sweet. Thank you.

Let's just say that what you link up needs to be wreath-related and to link back to Modern Country Style in your post.

{But if you'd like to Follow too, then you'd be extraordinarily welcome.}

:-)

And now for the PARTAAAAY (which will be open until Wednesday)!....Let's link 'em up!! 


Enter your email address:

to subscribe to Modern Country Style


Thursday, 9 December 2010

Wreath Week: Cinnamon and Orange Wreath Tutorial


Welcome back to Wreath Week. Just one more day to go until my very first linky party.

{Eeeeek! }

If you'd like to proudly wear a Wreath Friday Party button on your blog, it's just over to the right on my sidebar. All the cool blogs are doing it, dontcha know? And you want to be cool, right?

{Oh, my marketing skills are just pure wizardry, aren't they? ;-)}

The time has come to present to you my all time favourite wreath in the whole wide world ever.


 It sums up everything that's traditionally Christmassy. Cinnamon and orange together are a match made in heaven, don't you agree? Extreme yumminess.


With this wreath, I worked in the opposite direction from the natural wreath. With this one, I started with the bigger items, the bunches of cinnamon, and worked down because this wreath doesn't need to be covered in the same way as the last.


This is what you need to make this exact one:


As a quick aside, do you know how to make dried orange slices? You just buy some cheap-as-chips BIG oranges and slice them through the middle to get the star shape of the segments.


{Take out as many of those dang pips as you can.}

Now, the trick is to get every last drop of juice out by drying them VERY sloooooowly...otherwise they go mouldy, which I think we all agree is not a good look on a Christmas wreath....


 Lay them on a tray and pop them in the oven on its lowest temperature for a day or so.

{Yes, really, that long.}


Alternatively, put them on a plate in the microwave and set it to its lowest power for about 3 hours. 

{Hooray for Mr Microwave.}

Still quite long but the bonus is that it fills the house with a lovely orangey smell. Yum!


Now......onwards and upwards to the Cinnamon and Orange Wreath tutorial....

Step 1
Take small bunches of cinnamon sticks and trim them down to the size you'd like your bunches to be. Wrap some raffia several times around each bunch and tie really, really firmly. Yes, really, really, reeeeally firmly.

{Unless you want to lose them later on...}


Loop a piece of wire through the raffia and attach the wire to the wreath base by twisting it round the stems.

I've used five bunches of cinnamon...but I am a total cinnamon maniac so feel free to use less.


Step 2

Using an awl, poke a whole in the end of the pine cones. Pop a piece of wire with glue on in the little hole and leave to set. Twist the other end of the wire around the wreath base.


Step 3

Now use the oranges to fill in the gaps. It doesn't need to be completely and utterly covered. The gorgeous base you've made (Have you made one yet? Have you? Have you?) ties in so beautifully with the colours of the cinnamon, oranges and pine cones that it becomes one big wreath of scrumptialiciousness.

It looks weird just having one little orange slice all in its own so I pile them up in groups of three or four slices together. Poke a piece of wire in through one segment and out through another.


Do this slice by slice and wrap the end of the wire around the wreath stems to attach the oranges.


OR you can poke a piece of wire through three or four slices at a time and them attach them all together to the wreath. Both methods give slightly different effect so I did a mixture of the two.


{I like to live dangerously, don't I?!}
And there you have it. A homemade, gorgeously lovely Christmassy Cinnamon and Orange wreath!

Ta-daaaaah!


I wish I could explain how beautiful it looks and smells in real life. The heady scents mingle in the air as you walk past it. And the colours just glow.


I'm off to Harrods in London today for a spot of Christmas shopping! Yes, I do that most days, you know.

{NOT!}
See you tomorrow at my Friday Wreath party. I've picked out my dress already.....and I have matching shoes!
 

I'm linking up to my favourite linky parties in my side bar....

Enter your email address:

to subscribe to Modern Country Style


Tuesday, 7 December 2010

Wreath Week: Naturally Beautiful

Welcome, my lovelies, to ...

DAY TWO OF WREATH WEEK!!

Are you getting dolled up for Friday's Wreath link party? It's my first ever and I'd love you to be there with me. Thank you SO much to those of you who've posted my Wreath Friday button on your blogs.

I've put a copy of the button on the top of my sidebar, if any of you would like to join in the fun!

And what have I got for you today?

Taaaaa-dahhhh.....


This wreath-making session is for those of you that like something a little more natural at Christmas-time.

Have you seen this beauty from Pottery Barn? Now's your chance to make your very own!

Although, a friend of a friend of a friend has been known to leave wreaths up all year.

{Alright, you got me, that was moi...}


Natural wreaths are easy-peasy to make.
All you need are dried flowers and some glue...oh, and your home-made freebie wreath base from yesterday's post!


It's best to think of these natural wreaths in terms of having three layers on the base.


The first layer's purpose is for general coverage. This should be in a neutral colour in order to show the other layers off to their best advantage. You could try something like sage but I like santolina stems best. I love the white-grey colour and they're so easy to work with.


Layer two is the supporting role, made up of one or two different types of small-ish flowers or seed heads. This layer provides some colour and prettiness to the wreath without detracting from layer three! My wreath uses lavender for layer two, which adds a beautiful fragrance too.

{It also makes getting your hands covered in glue that much more enjoyable when you're surrounded by a heavy fug of gorgeous scent.}


And the final layer is the star of the show! Beautiful flowers or seed heads that draw your eye and give the wreath the wow-factor! Here I used large dried hydrangeas that only have a touch of their pinkness left. SO pretty.

{I have a thing about hydrangeas.}


Don't worry too much about your choices, though. As long as your chosen flowers dry well, just go with what you love. I love using flowers from my garden here in England so I just work with what's available.


So, now we've chosen our three layers, we're ready to begin!


Tie any hanging ribbon or raffia to the wreath before you start adding flowers because it's a nightmare to put in afterwards.

{So speaks the sad voice of experience....}


Taking a stem from layer one, dip the end into the pva glue and push it into the wreath. Repeat with more and more stems, overlapping each one with the previous, until all the base is covered.


Then, take small bunches of your layer two choice and continue the process. Glue, push in, glue push in...


Finally, put in three or five of your layer three flowers, equally spaced, round your wreath.

I've only chosen photos of the finished wreath this time because gluing photos aren't much to look at!!


Oooh, pretty wreath, I love you!...and I'm linking up to lovely Holly's party at Homebody.


Next time, I'll be sharing how to make a more typically Christmassy wreath. It's my absolute favourite!!

Cinnamon and Oranges anyone?

I'm partying with my favourite girls in the sidebar.


Enter your email address:

to subscribe to Modern Country Style


Monday, 6 December 2010

Wreath Week: Make Your Own Wreath Base


Welcome to Wreath Week!

After today's post, you'll know everything you need in order to make a gorgeous natural wreath base, you lucky things!

{And did I mention free?}

They're pretty quick to do once you know how and the best thing is, the base can easily be made from prunings from your garden, or the local countryside.

{And did I mention gorgeous?}


Then, over the next few days, I'll share how I've made several different styles of wreath: from the lovely and natural to the super-duper festive!!

On Friday, I'm going to have a Wreath Party for people to link up all your beautiful wreaths. And guess what? You're ALL invited!


Modern Country Style


Yes, I've made my first ever button to celebrate my Wreath Party.

{Oh my goodness, I can't even begin to tell you how long this took me...}

Please would you mind putting this button on your sidebar to spread the word?

{If you have Blogger, just copy the html in the box below the button and paste into the html widget on your side bar in the design page of your Dashboard}.

THANK YOU!


Wreath bases can be made from any long and pliable stems. The best kind to use are willow, honeysuckle, vines and ivy but if you know another kind of tree with long bendy stems that needs a cut, then by all means use those!!

{Okay, ready? Do you have your stems? Then off we go....}


Step 1
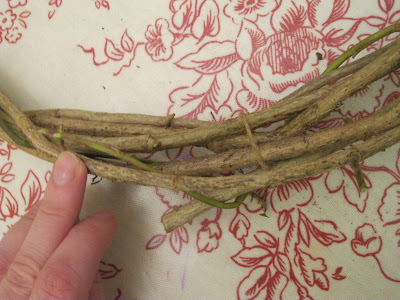
Start off with three or four long stems, which will end up being roughly the circumference of your finished wreath. Lay them out in parallel but stagger them slightly, like this:


Tie them together together once at each end with jute string.


One end...

...and then the other end...

Step 2
 Now bend the whole thing round to form a circle. Let the ends cross over at the top.


...and tie together where the two ends cross over.


Pull the loose ends down each side of the circle, twisting them round the rest of the stems....


...and tie in place with jute string.

Please don't worry if at this point it's all looking rather messy and not very circular. The beauty of this method is that the shape is made firmer as more stems are added.

{See? Mine is pretty messy at this stage, even though I've done it lots of times before...}


Step 3
Now, get another stem and poke the thicker end into a gap in the wreath base to secure it. Use the less pliable stems at first and leave the very bendy ones until the end.

Here, I am poking my stem into the wreath base:


And in it goes...

Start wrapping it around the other twigs. The easiest way to do that is to bend it gently through the middle if the circle.....


 ...and out the other side, and then bend it round again gently, up and over the outside of the wreath, in through the middle of the circle, and out the other side. Towards the end of the stem, it's usually much more pliable and can be wrapped more tightly without the risk of breaking it.  


...but if it does snap...and some probably will....it doesn't matter one jot. Either tuck it in as neatly as you can, or take it out altogether, and start again with a new stem.


When you get to the end, just tuck it into the other stems in the wreath base to secure it.


And then repeat with the next stem.


And the next....wrapping each stem in and out of the centre of the circle as many times as you can.


With each stem, take a step back and see which part of the wreath most needs shaping and then concentrate on that part.

For example:


Can you see that my wreath is wonky here:


so that's where I concentrated my efforts, pulling extra tightly around that area.  Keep going until it looks something like this:


{Are you with me so far? You are? I've always thought you were particularly clever...}

Step 4
If your wreath base is looking slightly misshapen, you can squeeze it a bit on either side to push it into shape. This is the way I do it:


Step 5
If you notice any stray ends, just snip them off with sharp scissors or secateurs.


Step 6
Now that you're near the end, make sure you choose the super-bendy stems to work with. These will form the holes to tuck your wires and foliage into later....


Then, when you've finished, stand back and admire your beautiful wreath base.

This probably took me about fifteen minutes, including cutting the stems from my garden.


{And at least five minutes of that was gearing myself up to venture out into the snow for you...}


I love making wreath bases. They're incredibly satisfying.

But best of all is that now you've got the perfect foundation for making some absolutely stunning wreaths.

Come back tomorrow and I'll show you how...

{Hint: You're gonna love me forever}


Enter your email address:

to subscribe to Modern Country Style


Related Posts with Thumbnails
 
01 09 10