Friday, 23 July 2010
Natural beauty
I bought these splendiferous candle holders in town the other day. It was the colour (or rather lack of it!) that caught my beady eye at first. They are a perfect washed-out sea-grey.
I find it's a very fine line between a beautiful weathered look (new or otherwise) and knocked-about nastiness passed off as 'distressed' for bringing in extra pennies. The latter are, in my opinion, to be avoided like the plague. The choice of material ensures these fall into the category of perfectly distressed.
Anyway, off my high horse (so easily climbed upon!!) and back to these objects of loveliness. When the candle is burning, the carved pattern on the sides casts its shadow on the walls. Very atmospheric indeedy!
They've even got little circles for the night light to sit in.
It almost makes me look forward to the evenings drawing in! Almost, but not quite.
I hope you have a lovely summer weekend, long dusky evenings, warm breeze in your hair and a glass of scrumptiousness in your hand. Enjoy. xx
Thursday, 22 July 2010
A present in the garden...
We have other mop head hydrangeas but none like this! It's like being given a lovely present.
Wednesday, 21 July 2010
Book review: Comfortable Country by Enrica Stabile
There is less of an emphasis on texture and quality, and more on chintz and swirls. That's not to say that some people wouldn't rightly love this style but it doesn't ring my bells.
A quote from the book is quite telling. 'Recapture the unassuming style of a contented era not so long ago..." Traditional style is more about looking back to the 'contented' past (although, life for a country cottage worker would have been anything but contented...) and Modern Country Style is more about taking the very best from the past and moving it forward, if that makes sense.
Here's an example of one I dislike (too lurid, too stripy, too cluttered...):
Having said that, there are some lovely photos in Comfortable Country.
The garden section, especially, is beautiful.
The content of the book is divided into two parts, Country Influences (changing seasons, peacefulness, nostalgia, utility and natural materials) and Country Rooms. I love the utility and natural materials sections. There's plenty of inspiration. Here's an image I like (love the mix of chairs):
The writing is lovely and really draws you into the heart of the book, which is about creating the feel of comfort and relaxation within a country setting and that is where Traditional and Modern Country Style's paths DO cross.
Overall, Comfortable Country is a nice book to have. Not so much for the pictures, although the are plenty of gorgeous images, but for the text, which has a good mix of practical suggestions and dreamy and evocative inspiration.
Tuesday, 20 July 2010
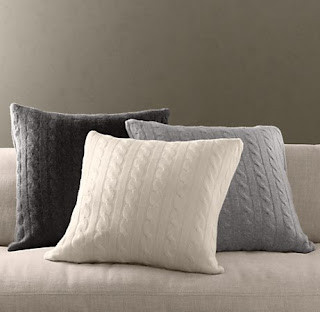
Another home-made snuggly cushion!
The look and feel of the lovely cream wool kept drawing me back and I realised there was easily enough wool to create another snuggly cushion. Yay!
Having already detached the sleeves from the body of the cardigan, the next step was to unpick the two, slightly triangular sides and then to tack them together to make straight sides. I used bright red cotton so I could see clearly where to sew.
Setting my sewing machine to a tight zig-zag stitch , I sewed along three of the sides, leaving the original hand hole as the open side.
I then measured how large I wanted my final cushion to be and made an inner to fit.
This is pretty easy to do.
Measure the final size of your cushion and cut two pieces of pale non-stretchy material (cotton works well) to these measurements plus a seam allowance (1.5 cm is good) all round. Sew these two pieces together to the desired finished dimensions, leaving an opening for the stuffing. Down or good quality synthetic stuffing are best to avoid a lumpy look.
Stuff the cushion, paying special attention to the corners and sides to get an even plump feel.
Sew up the opening by hand or machine (because the inner is hidden, the sewing doesn't have to be super-neat). Et voila! Your very own bespoke inner!
I carefully cut along, and slightly away from, the newly stitched lines of the knitted outer to create the finished cushion shape. The tight zig-zag should stop the knitting unravelling.
This is the cushion currently. When stretched the wiggly sides even out. (Yes, I worried about that too!).
Today is a day of pondering where to take it from here. Ideas welcome!
Monday, 19 July 2010
Beverley Hewitt mug....
The shape of the mug, whilst being classic, feels original, rather than a rip-off of one of the better-known ceramicists.
The lettering is bold and clear (and, perhaps more importantly, hasn't faded in the dishwasher!). I especially like the 'LOVE' down the handle.
I'm really pleased with it! More of Beverley Hewitt's gorgeous designs can be found here.
Friday, 16 July 2010
Back issue inspiration...
The article was about a Victorian London semi, renovated by the photographer Paul Massey.
It looks quite ordinary from the outside.....
...but inside, it's scrumptious!
I LOVE that sofa. Mmmmmm.
Wednesday, 14 July 2010
Modern Country Style shops: i gigi
Going into i gigi , in Hove, East Sussex, is like stepping into an alternate, incredibly chic reality. The owners have got an amazing gift for arranging and displaying their wares.
They sells men's and women's clothes, furniture and accessories for the home but it's the homely bits that really sells this shop to me.
The ranges all fall into a delicious earthy palette of muted greys and browns, which could sound drab, but in their capable hands becomes modern, elegant and exquisite.
They've also recently opened a website http://www.igigigeneralstore.com from which you can browse and buy until your heart is content (which will only be when you've bought the contents of the entire shop, believe me!).
i gigi has an amazing mix of vintage pieces (when I was there they had an elm table fashioned out of a hundred-year old door...nice) and carefully chosen new pieces.
A huge amount of careful thought has gone into designing the shop (which you can peek at virtually on their site), including importing a staircase from France - when did you last do that?!!
All photos are the property of i gigi (yes, photography is another thing they can do well. Grrr!!).
Tuesday, 13 July 2010
Modern Country Bedroom: lighting
I really like it's understated elegance. It's a good height, too, so casts a lovely glow.
My final light choice was for the other end of the room. This was one of those serendipitous finds that I didn't really know I was looking for......UNTIL I FOUND IT!
Light of my life, I love you!
It's a scrumptious lamp, in chrome and leather. It's beautifully articulated so can be angled any way you please. Pure lighting yumminess. It makes my heart sing when I see it.
And that, ladies and gentleman, is the lighting tour of our Modern Country Style bedroom!
Monday, 12 July 2010
Modern Country bedroom ... details
After playing around with lots of ideas, I knew I wanted to go for a Modern Country style bedroom (see inspiration photos) and for our bed, piled with pillows and gorgeousness, to be the main focus of our master bedroom. Possibly, the fact that I was absolutely shattered during that pregnancy helped with the appeal of the bed! It's a mahogany sleigh bed, the very first piece of furniture we ever splashed out on. It's eleven years old now but is aging beautifully!
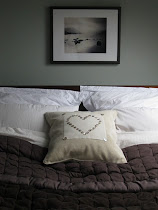
I thought a picture would look great above the headboard but wanted nothing too big because of the asymmetric slope of the ceiling. I chose this restful photo by Jeff Teasdale called Westwater #1. Not quite black and white, yet not quite colour, I love the way it tones in with the feel of the room.
At the end of the bed, is an old leather suitcase. This is great for storing winter bedding during the summer, as well as for adding a vintage note to the room.
I'm especially thrilled with the bed cover/ quilt (there must surely be a better name than this!). It's total luxury. It's made from thick velvet and silk and makes you feel like a princess at night (always a good thing!). The colour is officially 'Dusk', which translates as browny-grey. It's lush!
Colour-wise, I chose: white, brown, Farrow and Ball's Light Blue and a couple of touches of black. It was in here that I first started to appreciate the look of a limited palette. There's nothing bitty in this room. Blocks of muted colour are what I like best.
We even chose a Modern Country Style bin! I'm obsessed with getting the details in place!
A peaceful master bedroom is just the ticket with baby twins!
Wednesday, 7 July 2010
Modern Country Bedroom
I'm so in love with the paint on the walls. I could stare at it for hours...and probably have! I chose Farrow and Ball's Light Blue - of course, not a true blue at all, but a dirty grey/green/blue. Incredibly restful, without being wishy-washy. I think it's one of the nicest colours in the world
I love clothes so I knew we'd need a lot of storage. I really enjoyed designing our cupboards. We've got 2 and a half double wardrobes and a large shoe cupboard, which you'd think would be enough for any girl (and her husband!) but I do seem to have a bad habit of expanding to fill the space I'm given!
I really adore how this room has turned out. It was one of the first rooms that we renovated so I was finding my way.
Monday, 5 July 2010
The sunset to end all sunsets....
I turned to see the most stunning sunset I have ever seen in my life. It was so incredible that it took me a few seconds to realise that it was, in fact, a sunset. All was changed.
The sky was an incredibly vivid coral, streaked with gentle mauve. The combination was utterly breath-taking.
I ran to the top of the house to get an awesome, panoramic view. The sky was transformed.
Even the pictures don't capture the glory of the evening.
We all stood and watched, mesmerised, as the sunset gently trickled away.
Completely captivating.
Friday, 2 July 2010
Tutorial: Home-made snuggly cushion
I had a cardigan that had been hand-knitted from incredibly tactile, cream, woollen yarn. Gorgeous but massive on me! I thought it would make a fantastic Modern Country Style cushion if I could upcycle it. ("Upcycling is the process of converting waste materials or useless products into new materials or products of better quality or a higher environmental value." Thanks, Mr Wikipedia!)
Here's how I did it.....
1) I had a good look at the main body of the cardigan with the buttons done up. Here's the front of the original cardy (the back is just plain):
I planned to use the the front of the cardigan for the front of the cushion and the back of the cardigan for....you've guessed it...the back of the cushion!
The side seams met were straight lines, rather than being curved to fit a body, meaning I could leave those seams to form the sides of the cushion, without having to unpick them. The more you can use the existing seams of the cardigan, the less worrying you have to do about cutting into knitting that might fray at a later stage. See how neatly the side edges are finished already:
2) I needed to choose a height for the cushion. I chose 52.5cm, or 50cm minus seam allowance. That seemed ideal to me, though if you want a diddier cushion then by all means make it smaller!
To ensure the front and back were precisely attached, I counted the number of of knitted stitches across both the front (buttons done up) and the back and, happily, there was the same number on each. I turned the cardigan inside out and tacked the front and back together with red thread (so I could see it!) across the body of the cardigan perpendicular to the bottom edge but 51 cm higher (remember I'm adding space for the seam allowances). I made sure that, between each tack, there were five knitted stitches on the front and back, and that each tack was five knitted stitches long, front and back. Make sure you keep your tacking line perpendicular to the bottom edge by running it along the same row of knitting, like this:
I know that sounds complicated but it's not - honest! Here's a photo example of the counting. Can you see the five labelled stitches? Keep it like that - front and back and you'll be fine!
I then used a very tight zig-zag stitch and stitched over the tacking line (51cm up from the bottom) so that the knitting wouldn't come unravelled when I cut it and unpicked the tacking, because, let's face it, after all that counting, it would be pretty darn annoying. Grrr.
If that is done properly then you get a nice straight line along the seam joining the front and back sections when you turn the cushion the right way.
3) The next stage was to carefully cut off the top of the original cardigan about 1.5 cm above my stitched line (a tense moment but it was fine!). This left a 52.5 cm tube (with the buttons still done up, remember).
Here's a photo of the top edge, sewn and cut but still inside-out, and the side edges of the cardigan in place. See how straight they are?
4) I sewed up the bottom of the cardigan, 1cm from the edge (to make the bottom edge of the cushion). This time I used straight stitch on the sewing machine, as the knitting had already been neatly cast off during the cardigan-making process; this also meant I could reduce the seam allowance to 1 cm, reducing bulk.
Here's what will be the bottom edge of the cushion:
Here is a photo of the back:
5) I wasn't keen on the original plasticky buttons on the front so I snipped them off and sewed on large mother-of-pearl ones.
6) Turning it all the right way around, you can see it's nearly there as a cushion. Exciting moment!
The original opening of the cardigan provides the opening for the cushion insert, which I made especially to fit plumply inside the cushion (which is 60 cm x 50 cm when turned the right way around), with cotton casing and good quality stuffing (the cheap stuff goes very lumpy). For a quick look at how to make the inner (easy peasy), look here.
To make the cushion plumper, add more filling! But I have made the mistake previously of making a cushion inner so over-filled it was literally bursting at the seams so be warned!!
7) I placed the new pleasantly plumptious inner (a whole new tongue-twister - who knew I could be so creative during a tutorial?!) inside the cushion, shaping and coaxing as I went to ensure all corners were properly poked out, using my finger, like this:
8) A nice easy last step: do up the buttons and admire your handiwork!!
And there you have it: a beautiful snuggly cushion upcycled from a too-big cardigan!
This project was quick and soooooo rewarding. It probably only took a couple of hours and if I did it again, I'm sure I could run it up in half that time, because I was feeling my way a bit through this project. Want to see what I did with the armsof the cardigan? Have a look here (the start) and here (the embellishing) for more ideas.
My knitting isn't very even,*blush*, so this was a great alternative for a knitted cushion. I'm so pleased with it and have to point it out to everyone who visits!!
Have a good, crafty weekend and thank you so much for visiting Modern Country Style. See the 'comment' box? It's a-waiting for you!