Showing posts with label Annie Sloan. Show all posts

Friday, 22 July 2011

Paint, Please link party....oh, and my table reveal.....


Hello there, honeypops.

Welcome to my 
Paint, Please link party. 


So....where were we?
I've taken you through the whole process this week of painting a piece in 
My Beginners' Guide To Painting Furniture
If you've missed any posts, then you can find the whole series by clicking here.

And today, I do believe I promised you the big ta-daaaaaaaaaaaah! 
So without further ado, let the big reveal begin!

Here's what I started with. 
An extending oak dining table in a baaaaaaad way.


I've created a weathered white oak finish on the top, using Annie Sloan paints.


And a mixed-by-me paint on the base.


I've called this colour Modern Country Grey. 
{It's a perfect cool grey-green and I am in love.}


I want to paint our entire house from top to bottom in this colour and then 
walk around in a haze of bliss. 
{Mr Modern Country has vetoed the idea.}


I'm really hoping that this Beginner's Guide To Painting Your Furniture is showing you that there's NOTHING to be scared of. Because there really isn't. If you make a mistake you can wipe off and start over. 
Easy as pie.


Did I ever tell you that I LOVE throwing parties here? 
I absolutely LOVE looking through the posts you link up. 
I LOVE finding new blogs to ogle. 
I LOVE seeing what you have to share.


You can link up anything to do with paint....

favourite paint colours,
room redos,
painted furniture,
plus anything you'd like paint advice about....


Let's get this linky party on the road, shall we?
It'll stay open for one week.

 Here are two things I'd love you to do:
1) Follow Modern Country Style 
if you like what you see here.
2) Link back to me in your post 
so other people can come and find the party. 

Then everyone who comes over to Modern Country Style from other blogs who've linked back will be able to see a link and picture from your blog, and they can come and visit your fabulousness.

Not rules, exactly...but I'm hopeful. ;-) 


Oooh, and one more thing....
next week, we'll be having a good look at eating spaces. 
How to make the space inviting, warm and cosy.

Sounds good to me.


Enter your email address:

to subscribe to Modern Country Style


Thursday, 21 July 2011

Beginner's Guide To Painting Furniture Part 3: Painting


Hey peeps,

Only one more day until my 
Paint Please link party! 
Swing by tomorrow from noon (GMT) to link up your paint-related posts:

favourite paint colours,
room redos,
painted furniture,
plus anything you'd like paint advice about....

I hope you liked the White Weathered Oak look I showed you yesterday. 
I love it on the dining table I've been sharing with you.

This is what we're doing today: 
painting!


Once I'd completed the table top, 
it was time for the very pleasurable task of 
choosing a colour for the table base.

A quick aside: 
I haven't bombarded you with a million products. 
Only the ones that I've tried out that not only work but work WELL.

As you get better and more confident then that's the time to branch out and try different things. But when I first started I wanted someone to hold my hand through the whole process.

And that's what I'm here for.
Hand holding.


I gave the table a base coat of Annie Sloan's Old White.
Annie Sloan's Chalk Paint DOESN'T NEED SANDING OR PRIMING so I was able to paint straight onto the varnished base, and the plastic-coated table collar.

So quick and so easy.


I painted quite thickly and with brush strokes in lots of different directions, creating texture, to which the top coat could cling.


Remember I said that Annie Sloan's Chateau Grey caught my eye?
This is how it looks unmixed, so you can see its components.


I mixed one third Château Grey with two thirds Old White. 
And then I added a dribble of Graphite to produce 
a GORGEOUS gentle grey-green.

Paint it on in a normal back and forth motion. 
It will pick up the texture of the base coat gorgeously.
{For a smoother finish water down your paint slightly.}


I LOVE it!

I gave the base a coat of clear wax, which will protect it, and enriches the colour slightly, as you can see in this photo where I am halfway through.
(Right half is waxed).


Isn't the colour incredibly beautiful?
Farrow and Ball eat your heart out!!

And with a full coat of clear wax:


I wanted a slightly rustic-looking top of the table with quite a clean looking table base so I kept the dark wax to a minimum.
A perfect mix of Modern and Country.


Once again, because I'd used clear wax first, 
any readjustments along the way were easy-peasy. 
Just wipe as you go to get the finish YOU want.

A bit too much dark wax?


A quick wipe and it's just right!


Don't feel that you have to go along the 
Shabby Chic method of painted furniture.
Painted furniture works for a whole range of looks: 
Modern, Eastern, Country, Scandinavian, Vintage, Classical.

And, of course, Modern Country...

See you tomorrow with 
all your paint-related goodness.
{Plus the full and delicious table reveal!}


Love
Sarahx

Enter your email address:

to subscribe to Modern Country Style


Wednesday, 20 July 2011

Beginners' Guide To Painting Part 2: Weathered Oak


While stripping isn't my favourite afternoon activity, 
it does give me the chance to show you the GORGEOUS finish 
{White Weathered Oak, anyone?}
that I've created for the top of the dining table.

I've given you the tutorial here but I'm going to wait until
this Friday, at my Paint, Please link party
to do the full reveal.

Oh, and remember my new idea? 
If you have any piece that you're wondering about and would like some advice on, 
then do link up on Friday, 
among all the room transformations and other paint magic.

The finish that I'm about to share with you 
looks great AND is hard-wearing
{my favourite combination}.

This is how to achieve a weathered white oak look.

Mix up a wash of Annie Sloan Old White with water at a ratio of 1:1. 
{A little goes a long way.}
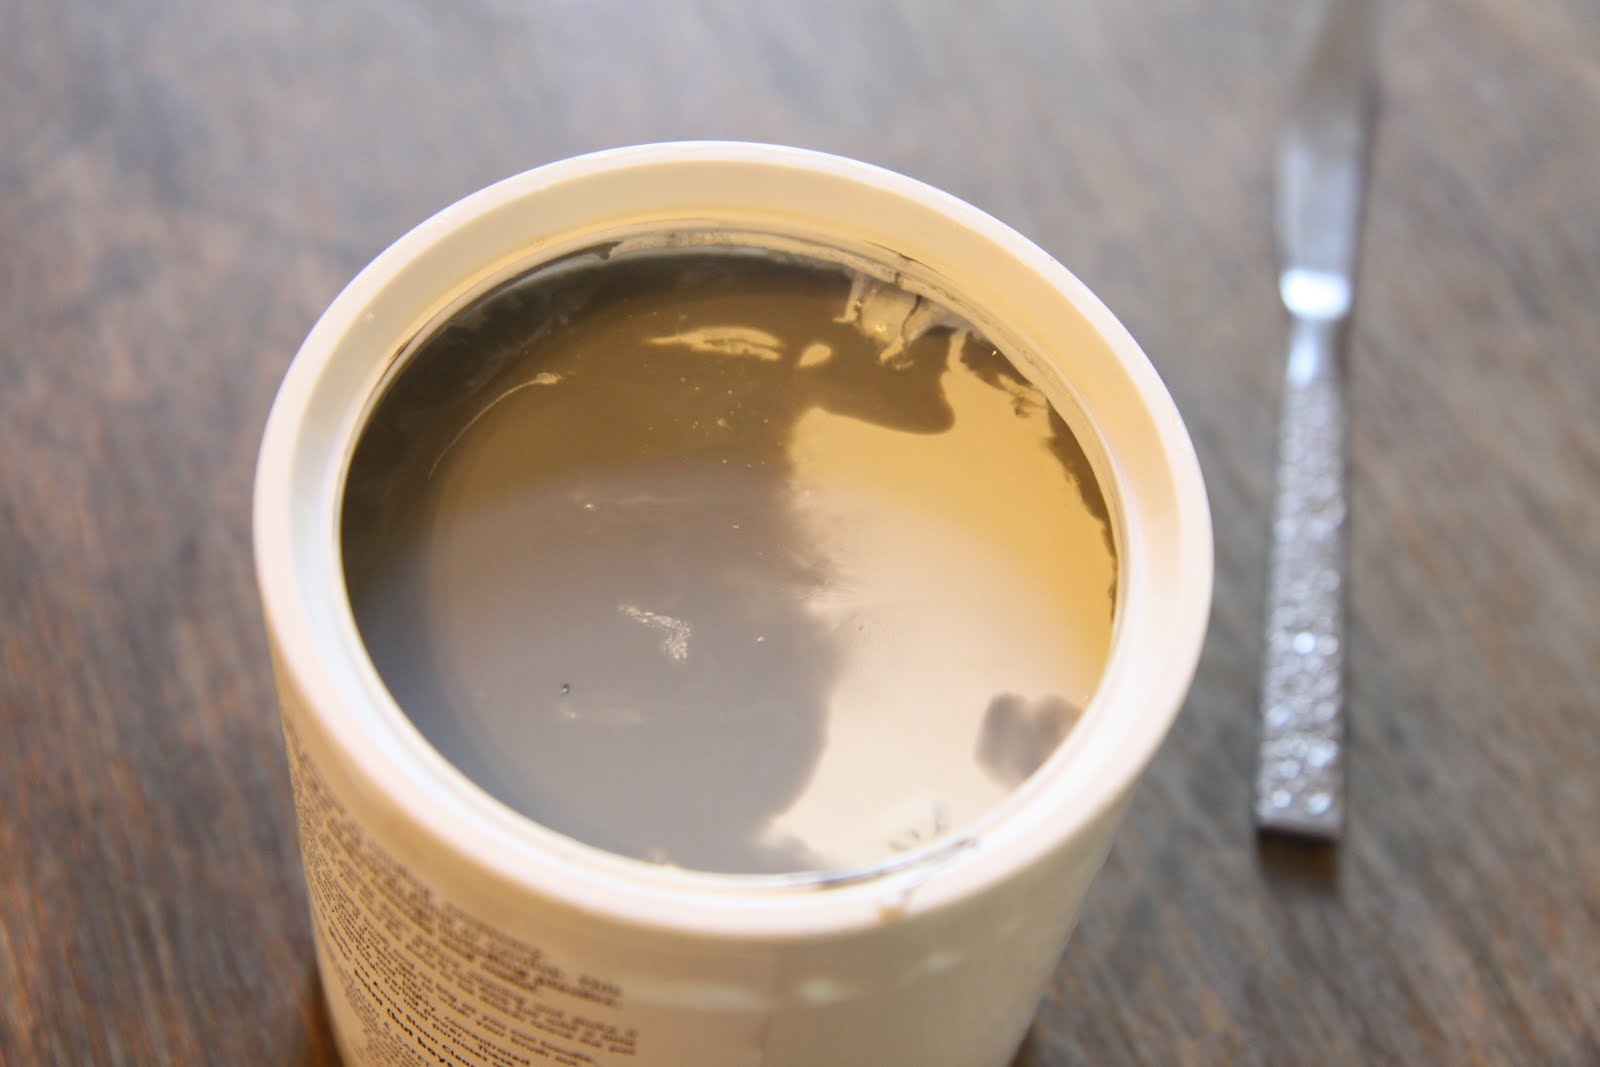
Make sure you mix the paint well before you pour it. 
This is how the can will look when first opened.... 


...but it mixes easily to a very slightly creamy white.
Paint onto a medium-sized area at a time.

Before the paint has had an chance to dry, 
fold a rag so there will be a smooth surface in contact with your piece 
(wrinkles in the rag will make streaky marks in the paint).


Rub the paint with the rag 
so that you'll be left with a thin translucent coat. 


It will leave this kind of finish:


DON'T WORRY THAT IT LOOKS UNEVEN. 
It's a vital part of the end look.

When it's dry, which will be very quick, 
rub in a layer of thin clear wax all over.


This will give a rich glow 
but, more importantly, allows you a lot of flexibility, 
as I'll explain in a mo.


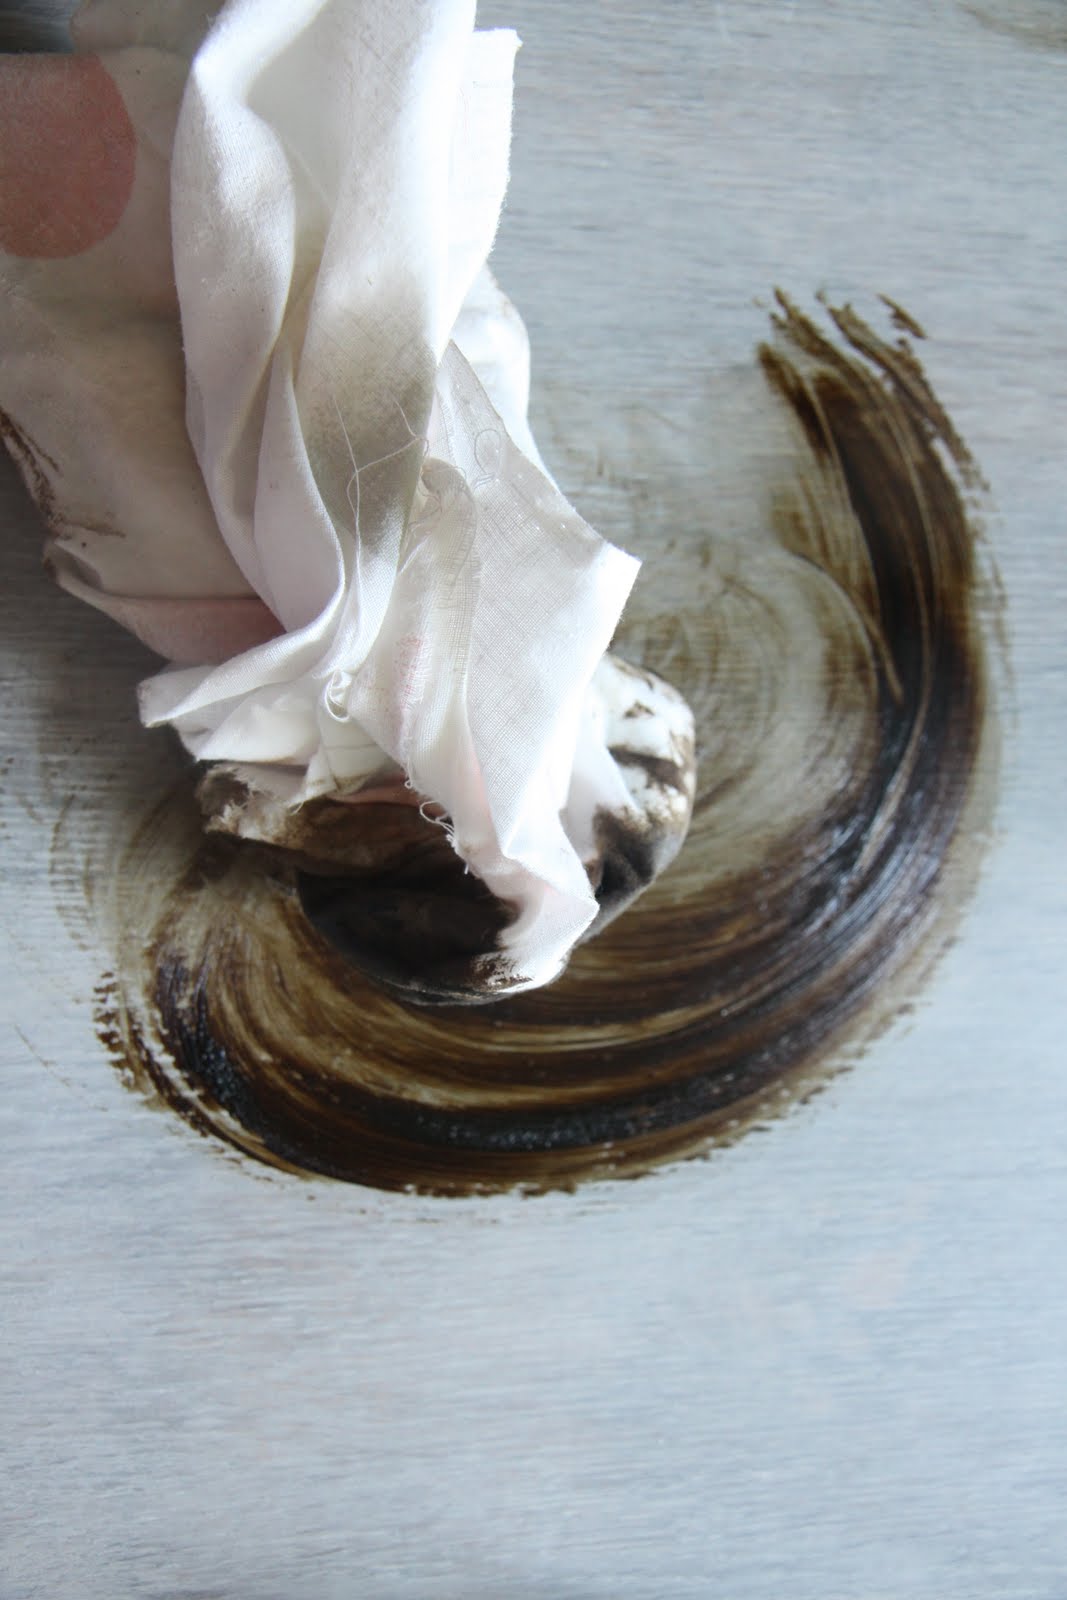
Then place some dark wax on the piece with your rag
and rub that in over the top of the clear wax. 


The dark wax clings to any grain lines in the table, 
and leaves its colour behind. 
I rubbed it around until I achieved this kind of look:


Just to show you how completely flexible working with Annie Sloan paints and waxes is, 
I want to demonstrate what to do if you make a mistake.


Simply smear on some clear wax over the top of the dark wax and rub. 
The dark wax will come away. 


If you want a slightly heavier feel with the paint in a particular area then you can add a bit of paint to the wax and the two magically combine to produce a coloured wax.

Then you can start all over again 
until you're THRILLED with your end product!!
There's SO much freedom to play around.


And if any marks do get scratched into it at any point, 
you can simply wipe over a little more dark wax and 
'Marks, begone!'.

I'm thrilled with this finish. I hope you have fun with it too.

See you tomorrow with a post I'm calling 
'Farrow and Ball: eat your heart out'.....


Enter your email address:

to subscribe to Modern Country Style


Friday, 15 July 2011

How to crackle your Annie Sloan paint AND make coloured waxes......

  Hey gorgeous,

Are you gearing yourself up for the 
Paint, Please link party 
NEXT Friday? 

I want to see how paint has transformed 
your house, garden and furniture.....
You'll be able to come over and link up 
so that we can all have a good ogle at your loveliness.
{I've put the button for the party on my sidebar if you'd like one}

Extremely excitingly, I'm guest posting at 
Janell's House of Fifty blog this week, 
and also at the ever-so-gorgeous 
Do pop by and say hi if you have a moment...
and if you've come over from there then
*squeeze* 
I'm so pleased you could make it.
Grab a seat, and join in!

Now have I got a cracker of a post for you today.....

Annie Sloan's Paints are magic.
Don't believe me?

Let me show you how to create a gorgeously antiqued look
...without the need for crackle glaze.


Paint on a THICK layer of the colour of your choice. 
{I used Paris Grey}
Don't spread the paint out. 


Then turn on your magic
 ...and most unexpected....tool: 
your hairdryer.
And cook that paint!!

Keep blowing in gentle circles over the paint 
and in a short time the paint will begin to crack.
Yes, crack!


And you'll begin to smile.
It's real magic.

No crackle glaze needed.

When the cracking has finished, 
and the paint has dried,
it can be waxed to protect it. 

Here's the second amazing part of the post. 
Did you know you can create 
COLOURED waxes?
{Any opportunity for a bit of Rainbow Writing} 
Yup, you can.

Here's how:

Just smear on a bit of Annie Sloan clear wax 
and add a daub of one of the Chalk Paints, 
{I chose a touch of Provence}
and rub over your paint for extra depth.

And, yes, I know that the wax is oil-based 
and the paint is water paint but what can I tell you?
They mix perfectly.
Magic paints, I tell you.


When you're happy with the final colour, 
you can start with the dark wax. 
This is definitely a case for showing the need for the dark wax 
because it highlights the cracks in the paint absolutely brilliantly.

Just rub it in gently and then wipe off any excess.
{The layer of clear wax underneath makes it 
easy-peasy to create exactly the effect you want}

And here's my finished sample board.


See how the dark wax nestles in the crevices?
Isn't it incredible?

Now, I feel it's time for a bit of real life painting action.
Next week, I'll take you through step by step 
how I painted our dining room table.

This week, I'm aware that I've whizzed through a lot of information.
Next week, I'll be slowing riiiiiight down.
If you're a newbie at painting furniture then DON'T worry one jot. 

Each step will be clearly and slowly explained.
{If you have a specific question then do let me know.}

I was looking for a site that explained things for absolute beginners 
and struggled to find one that didn't make me feel intimidated. 
So I hope to create that here.

The Beginner's Guide to Painting Furniture 
starts at Modern Country Style next week.
Bring along your piece of furniture that needs a little love, 
or cupboard doors that need a hug. 

Paint along with me.
And feel the magic for yourself.


Enter your email address:

to subscribe to Modern Country Style


Thursday, 14 July 2011

Distressing Annie Sloan. Yes, I crack myself up....


I've made you a present.
{I know, too kind, right?!}
It's a button for my 
Paint, Please link party
{to link up all your paints projects: rooms, furniture, crafts....}. 
If you'd like to put one on your blog post ready to link up then that would be just fine and dandy.

Here it is, complete with the html code 
to make a clickable button on YOUR blog:


Modern Country Style


You know when you have an experience that just sets you alight?

Those of you who follow me on Facebook will know how I felt after Annie Sloan's Paint Course
I came home absolutely abuzz. 
I was bouncing off the walls with ideas, information and inspiration.


It was an unbelievably lovely day. 
To be able to sit with like-minded people and 
learn from an expert like Annie Sloan was such a privilege. 
{Thank you so much, Annie.}

Once again, I think it's worth reiterating that the fantastic thing about Annie Sloan's Chalk Paints is that they can be successfully painted STRAIGHT ON to things such as metal, glass, wood, melamine, and varnish.......
Like this:


And produce long-lasting results like this:


Say goodbye to that sandpaper.
Oh, and the primer too.

The first thing we learnt about what makes Annie Sloan's paints different, 
is that you can use them to create the texture. 

Wouldn't it be great to learn how to produce something like this, 
which looks as though it's come straight from a French Chateau?


You want to know how to do it right now?
Oh, go on then!!!!

You get this effect by painting the FIRST COAT of paint in all directions, and by loading your brush with more paint than usual. Doing this will help to create the impression of layers and layers of paint that have accumulated over years, when combined with the following steps.

It doesn't have to be perfect. 
In fact, it SHOULDN'T be perfect!! 
{Was there ever a better instruction?} 
Blobs and are good.


Then for the second coat, paint in the usual backwards-forwards fashion with another layer of paint, which should be of 'normal' thickness
{if the paint seems a little thin, it's easy to water down slightly if necessary}.

Step three is to sand gently (or firmly for a more distressed look) 
so that the top coat is rubbed back in places to the first coat. 
By sanding all over with the same pressure, 
this will happen naturally in bumps and ridges that 
you created with the first coat of paint.

If there are other specific areas that you'd like rubbing back 
(for example, corners, or any areas that would receive knocks and scrapes), 
then by all means pay more attention to those areas.

Now, having waxed lyrical about the Chalk Paint, 
we learned next that they work best for a long-lasting finish
when finished with wax. 

Annie Sloan has two types of waxes. 
Clear wax and dark wax. 
The clear wax looks like this:


When I've heard about waxing furniture with beeswax, 
I've always thought of Wax Polish which needs so much 
elbow grease and buffing and rubbing. 
Interminable.

That is NOT what Annie Sloan's waxes are like.
Think more of smearing a thin layer of margarine on your table.
But with a lovely smell! 

Later, when its dried, you can gently buff it. 
The more you rub, the more of a shine you'll end up with.
But it's NOT hard work. 

More like rubbing in moisturising cream.


See that hair-dryer at the front of the image above? 
Whatever could it be doing there?
Find out tomorrow for the most magical thing ever!!

Love
Sarahx


Enter your email address:

to subscribe to Modern Country Style


Related Posts with Thumbnails
 
01 09 10