
While stripping isn't my favourite afternoon activity,
it does give me the chance to show you the GORGEOUS finish
{White Weathered Oak, anyone?}
that I've created for the top of the dining table.
I've given you the tutorial here but I'm going to wait until
this Friday, at my Paint, Please link party
to do the full reveal.
Oh, and remember my new idea?
If you have any piece that you're wondering about and would like some advice on,
then do link up on Friday,
among all the room transformations and other paint magic.
The finish that I'm about to share with you
looks great AND is hard-wearing
{my favourite combination}.
This is how to achieve a weathered white oak look.
Mix up a wash of Annie Sloan Old White with water at a ratio of 1:1.
{A little goes a long way.}
Make sure you mix the paint well before you pour it.
This is how the can will look when first opened....
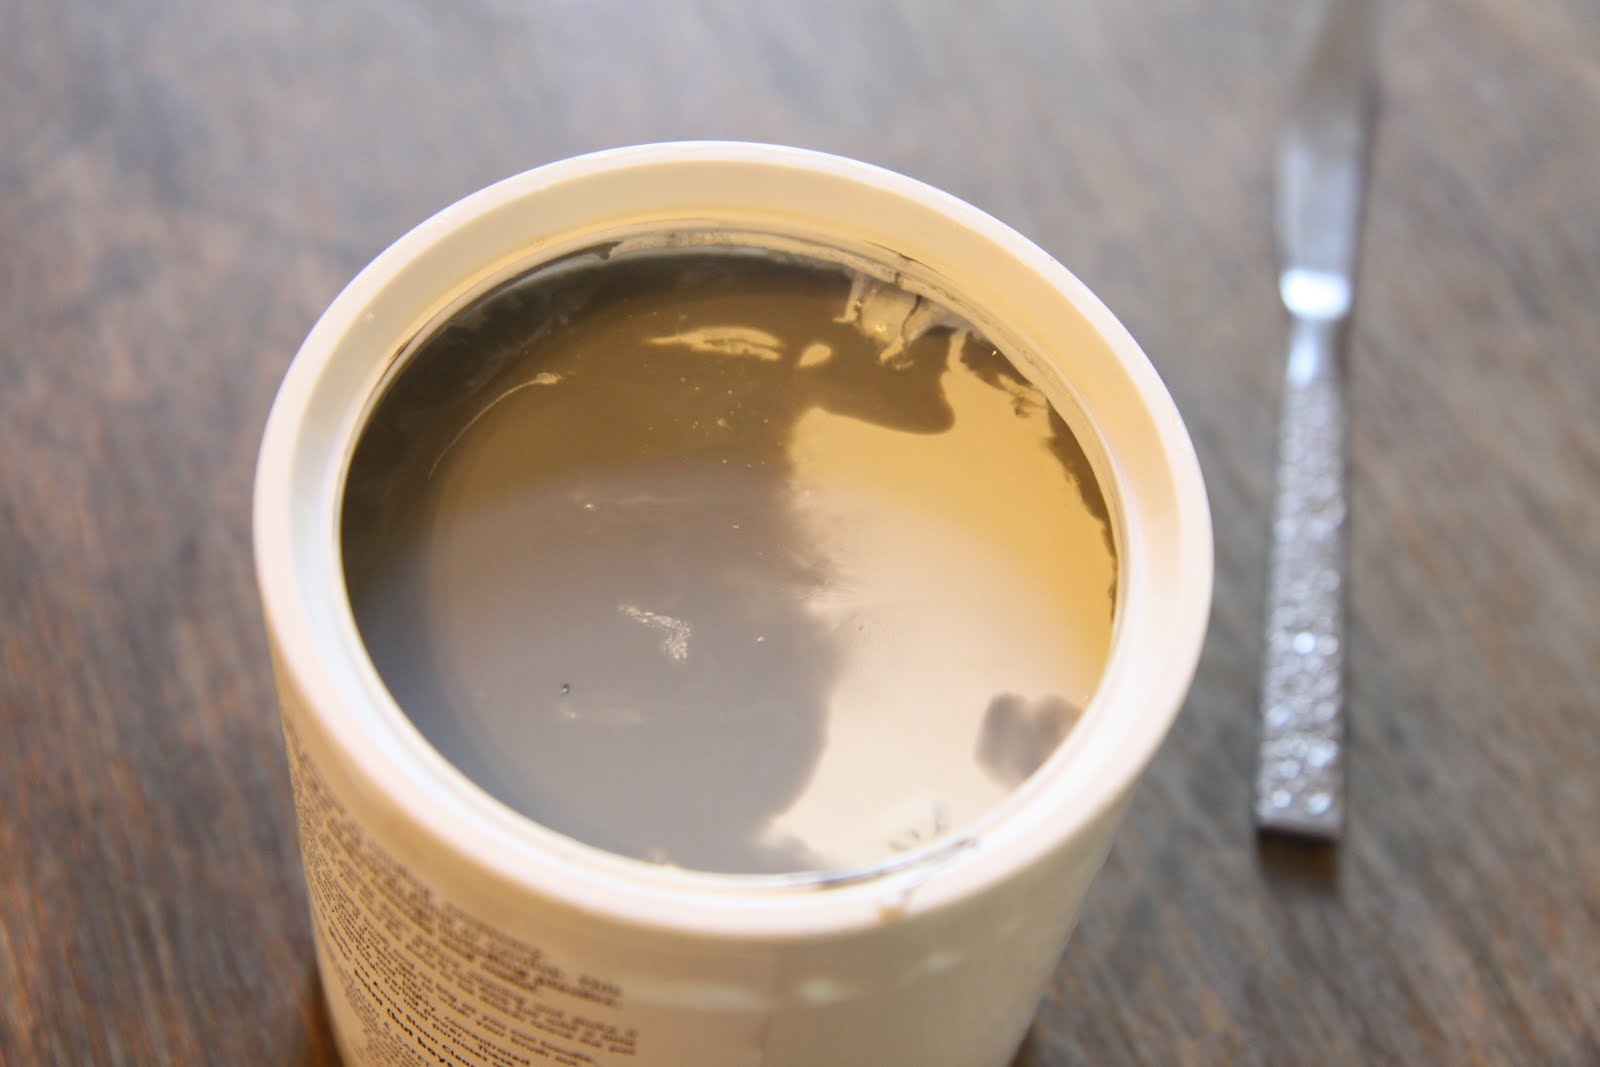
...but it mixes easily to a very slightly creamy white.
Paint onto a medium-sized area at a time.
Before the paint has had an chance to dry,
fold a rag so there will be a smooth surface in contact with your piece
(wrinkles in the rag will make streaky marks in the paint).

Rub the paint with the rag
so that you'll be left with a thin translucent coat.

It will leave this kind of finish:

DON'T WORRY THAT IT LOOKS UNEVEN.
It's a vital part of the end look.
When it's dry, which will be very quick,
rub in a layer of thin clear wax all over.

This will give a rich glow
but, more importantly, allows you a lot of flexibility,
as I'll explain in a mo.

Then place some dark wax on the piece with your rag
and rub that in over the top of the clear wax.

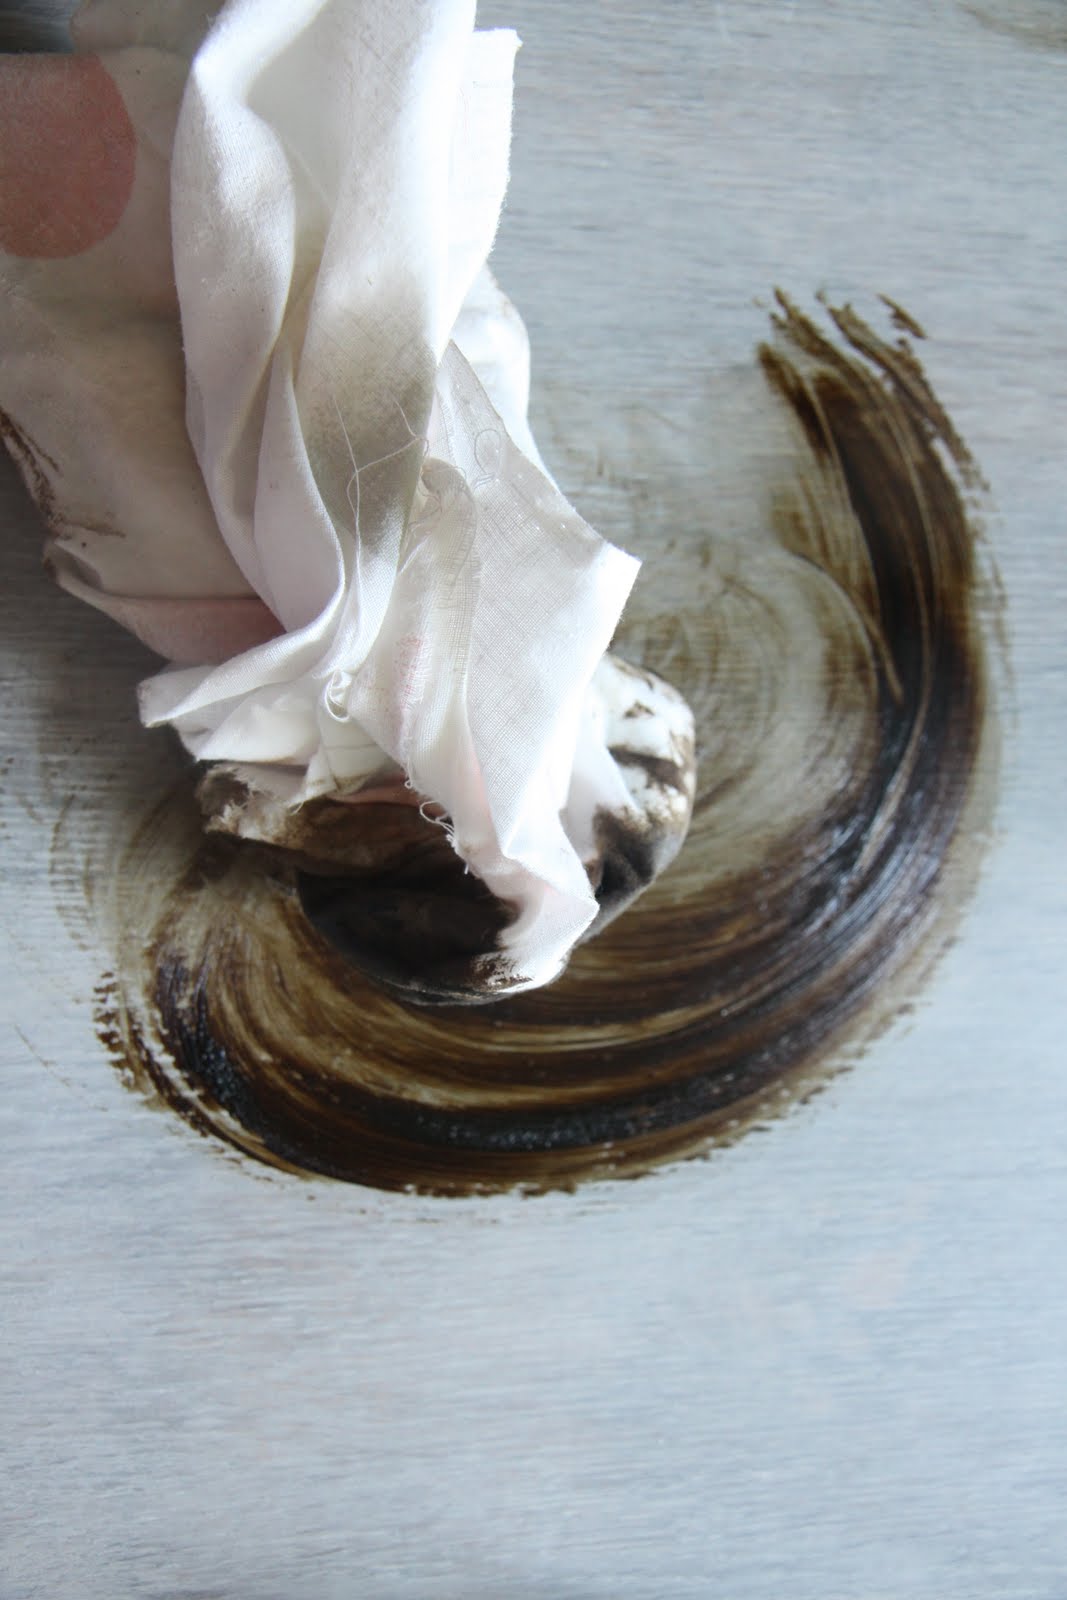
The dark wax clings to any grain lines in the table,
and leaves its colour behind.
I rubbed it around until I achieved this kind of look:

Just to show you how completely flexible working with Annie Sloan paints and waxes is,
I want to demonstrate what to do if you make a mistake.

Simply smear on some clear wax over the top of the dark wax and rub.
The dark wax will come away.

If you want a slightly heavier feel with the paint in a particular area then you can add a bit of paint to the wax and the two magically combine to produce a coloured wax.
Then you can start all over again
until you're THRILLED with your end product!!
There's SO much freedom to play around.

And if any marks do get scratched into it at any point,
you can simply wipe over a little more dark wax and
'Marks, begone!'.
I'm thrilled with this finish. I hope you have fun with it too.
See you tomorrow with a post I'm calling
'Farrow and Ball: eat your heart out'.....


22 comments :
Glad to have found your blog and that you are really digging into the abilities of ASCP. I have done a few pieces as well as all of my kitchen cabs! What do you know about painting over a piece that has been waxed? Do you have to sand it first or can you just apply more paint?
PS I added you to my sidebar to keep up with your latest posts.
Hi Sarah, I am really enjoying this series. I have a couple of pieces of furniture in mind to try out your techniques on. I did try and re-paint a small table before but will feel much more confident after reading your posts...thanks! x
Hi Sarah, I love this step by step process on your table. Can't wait to see the finish result. And hopefully join the party on Friday. Great stuff, as always! liz
Tease! Can't wait to see the finished project.
You saucy little missus you (i'm referring to your stripping activities of course).
Blimey, you've made that revamp look easy peasy lemon squeezey. Loved the finished product.
Thank you so much for your sage advice re the HDD debacle (hasn't worked btw - couldn't find any reference to Picasa - never mind).
xxxxx
Sarah it looks gorgeous already! I may try this technique with that small table I found on the side of the road. Thanks for the step-by-step tutorial, it is so helpful!
Oooo! Aaaaah! I just can't wait until I can start painting things again. I have a whole bedroom set just waiting for some paint love...
brilliant, sarah! what i love about your projects and posts most is that you seem to truly enjoy the process so your enthusiasm is genuine. thanks for sharing all your tricks!
michele
Hi Sarah! I'm catching up on your last 3 posts and think you are doing such a great job with these tutorials! It is so fun to see your project unfold and the table is looking gorgeous my friend! :-)
Vanessa
This looks so beautiful! I have a few little projects that I have been working on but I do not think they will be finished by your party. I still have to wax them and my wax has not arrived. Thank you for your in depth tutorials.
love your wonderful instructions Sarah - your depth of knowledge about how to achieve a variety of different effects with these products is remarkable! And you're so kind to share with the rest of the universe :) thanks very very much - I don't have a project in mind yet, but there are a few items still on the never ending to-do list. xo Diane
Love the finish on your tabletop!!
Sarah, can you tell us how far a can of Annie's paint would go for regular painting?
For example, I have a large-ish chest of drawers, a small chest and a bedside cabinet - would I need a couple of tins for them?
S x
Wow! You make it look and sound so easy!
:) I love easy!
Especially where furniture preparing is concerned.
This makes a beautiful finish!
Thanks for sharing doll!!
Deborah xoxoxo
Oh Sarah, laughing out loud as in my reader pane, all I could see was your first line of this post...While stripping isn't my favourite afternoon activity. Was wondering what kind of 'stripping' you were doing!
xo Cathy
Looks like wonderful amazing products!
Hugs, cindy
Can't wait to see it.
Wow, great post! Thanks for all the step by step directions. Your blog is is inspiring!
This is wonderful! The idea is totally great! Thanks for sharing:)
Love your creative space.
Hope to see you on my blog:)
Love the beautiful finish-thanks for the great advice-I'm your newest follower!!
I'm so glad I find you! I have had some questions about painting techniques and you seem to have answered them! I am now one of your newest followers.
Enjoy your day,
Gail
صيانة مكيفات جازان
تصليح افران جازان
صيانة غسالات صحون بجازان
صيانة ثلاجات بجازان
صيانة غسالات بمكة
صيانة غسالات ال جي بمكة
صيانة غسالات دايو بمكة
صيانة ثلاجات بالرياض
Post a Comment